Archive for the ‘Window Tips and Tricks’ Category

The Delhi High Court ordered the blocking of 219 websites which could be used to stream Fifa World Cup matches illegally. Order was passed on the basis of  Sony  who  owned Multi Screen Media (MSM), which has exclusive rights to broadcast the Fifa World Cup 2014 in India.

The original list of 472 websites to be blocked included some strange entries like Google Docs, but the order was then amended and the list brought down to 219; however,there are still some website which has nothing to do with World Cup

Let have a Trick to Unblock these website using DNS change

Change the DNS

If the URL change doesn’t work, then you might want to try changing the domain name server to Google DNS or OpenDNS. Most people have reported that this method works on BSNL for them. I am going to describe the step by step for diffrent device. If you are quite smart and techi you can also change your DNS setting of MODEM also so that you need to change it on every device.

For Windows Vista, 7 or 8 users

1) For Windows Vista and 7,
click Start > Control Panel > Network and Internet > Network and Sharing Center.

 If you’re using Windows 8, hit Windows key + C > click Search on the right-hand side > type Control Panel in the search bar > select Control Panel > Network and Internet > Network and Sharing Center.

2) Click Change adapter settings, which is on the left sidebar.

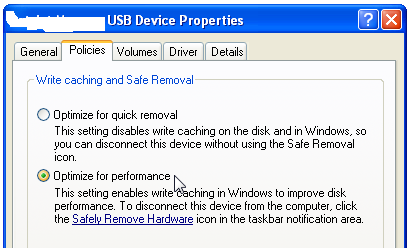
3) Right-click the Internet connection on which you’re having trouble accessing websites, and click Properties.

4) Select Internet Protocol Version 4 (TCP/IP), and then click Properties.

5) Click the radio button next to Use the following DNS Server addresses. If you want to use Google DNS, enter 8.8.8.8 as the Preferred DNS Server and 8.8.4.4 as the Alternate DNS Server. If you want to use OpenDNS, use 202.67.220.220 and 202.67.222.222 respectively. After entering these, click OK.

For Windows XP user.

1) Click Start > Control Panel > Network Connections.

2) Now select your specific Internet connection with access problems, right-click, then select Properties.

3) Left-click Internet Protocol (TCP/IP), and select Properties.

4) Follow the instructions in Step 5 above.

Apple  iOS device that’s connected to a Wi-Fi network.

1) Open Settings > tap Wi-Fi > tap the Wi-Fi network the device is connected to.

2) Tap DNS and change the two values to Google DNS or Open DNS (explained in step 5 above). These two values should be separated with a comma and one space (8.8.8.8, 8.8.4.4).

For Android users

1) Open Settings > tap Wi-Fi.

2) Long press the Wi-Fi network you’re connected to > tap Modify Network.

3) Now tap the box next to Show advanced options. Scroll down.

4) Tap DHCP > select Static IP > scroll down and modify DNS 1 and DNS 2 (as explained in step 5 above).

On BlackBerry 10

1) Settings > Network and Connections > tap Wi-Fi. Now connect to a Wi-Fi network.

2) Long-press the connection you’re connected to > tap Edit.

3) Scroll down and turn off Auto Obtain IP. After you do this, you’ll see more options, such as the IP address, DNS and gateway. Switch to OpenDNS or Google DNS here (as explained in step 5 above).

Unfortunately, Windows Phone 8 doesn’t support changing DNS manually.

Try a Proxy
If changing the DNS does not work, you should try a Web proxy to open blocked websites. These websites simply route you through servers based in other countries, which means that you can access websites that aren’t blocked in those countries.

Kproxy,Hidemyass and NewIPNow are  such websites. Just enter the name of the blocked website in the form and click enter. On the Hidemyass website, the free proxy is at the very bottom of the page, .

Have you ever noticed that using your 8GB or 16GB USB flash drives(pendrive) to copy larger single having having more than 4GB? If you have done so then you might get some windows error message stating that You don’t have enough space.(such as: There is not enough free space on the drive, or similar.) Does this sound familiar?

If you have faced such a problem, most probably it’s caused by the fact that your flash drive comes with  FAT32 file system from factory. This type of a file system has a built-in limitation on the size of the files that it may contain. Although the total size of the files that you can copy to a FAT32 drive could be as large as 2TB (or the physical capacity of the drive, whichever is smaller), the size of each individual file may not exceed 4GB.Such file system (FAT32/FAT) will not support copying file which is greater than 4GB.Here i want to mention that I am talking about file size of single file should not exceed 4GB.

This limitations is quite unwanted in present context but when FAT32 was designed no body anticipated that we would deal with large files as we are dealing today.Or, maybe the designers hoped that by the time such large files become common, the use of the FAT32 system would be replaced by the more modern systems.

But in any case we need to resolve the solution . This problem can be solved using NTFS file system.The latter does not have the 4GB file size limitation, and it also allows for many other functions not supported by FAT32: file security, encryption, compression, etc.
On the other side there are some limitations of NTFS also the older versions of Windows (such as Windows 95, 98, or Windows Millennium do not support the NTFS file system. If you plan on using the drive with such old computers, then DO NOT format the drive with NTFS, because you won’t be able to get the old Windows to recognize it anyway. If, however, you only plan on using the drive with the more recent versions of Windows, such as Windows 2000, Windows XP, Windows Vista, and of course Windows 7, such computers should work with the NTFS drives just fine.
Now I am going to tell you how you can change your FAT32 USB devices to NTFS in Windows Xp. Normally it is very easy in case of Windows vista/Windows 7 but it is little bit tricky in case of Windows Xp
By default Windows Xp will not allow you to format USB to NTFS. When you select “Format” in context menu of USB drive there you won’t have any option for NTFS.
Step to enable NTFS format of USB in Windows XP
1.      Insert the USB flash drive into the USB port.
2.      Click Start, type devmgmt.msc in the Search textbox and press  Enter.
3.      Find Disk Drives and expand it.
4.      Find the USB flash drive you want to format, and double-click it. It opens the  Properties dialog box.
5.      Click Policies tab.
6.      By default, the  Optimize for quick removal option selected, switch it to Optimize for performance and then pressOK.
7.      Now open My Computer. Right click on the USB Flash Drive and select Format. The Format dialog box now appears.
8.      Select NTFS in the File System field.
9.      Press Start and wait while the process will be completed.
10.   Now your USB Flash Drive is formatted with NTFS format.

Steps to format USB in Windows vista/Windows 7

1. Insert the USB flash drive into the USB port.
2.  Now open My Computer. Right click on the USB Flash Drive and select Format. The Format dialog box now appears.
3.  Select NTFS in the File System field.
4. Press Start and wait while the process will be completed.
5. Now your USB Flash Drive is formatted with NTFS format.

 MiniTool Partition Wizard Home Edition is a free partition manager software designed by MiniTool Solution Ltd. Partition manager supports 32/64 bit Windows Operating System including Windows XP, Vista and Windows 7. Home users can perform complicated partition operations by using this powerful yet free partition manager to manage their hard disk. Functions include: Resizing partitions, Copying partitions, Create partition, Delete partition, Format partition, Convert partition, Explore partition, Hide partition, Change drive letter, Set active partition, Partition Recovery

MiniTool Power Data Recovery is an all in one data recovery software. User can recover lost data from hard disk, CD/DVD disk, memory stick, memory card and USB flash drive. It can recover data after accidental deletion, recover data from formatted partition, deleted partition and damaged partition. With MiniTool Data Recovery Boot Disk, user can also boot computer directly to recover data after system crash, hard drive crash.

What is WinToFlash
There may come a day that optical drives are as hard to find as 5.25 floppy drives are today.
WinToFlash starts a wizard that will help pull over the contents of a windows installation CD or DVD and prep the USB drive to become a bootable replacement for the optical drive. It can also do this with your LiveCD.
You don’t have to worry about scratches on the disc or misplacing your original media discs once you transfer their contents to the flash drive. The optical drive is quickly becoming a thing of the past, especially in office environments, as media is shifted to the cloud.
WinToFlash is a free and easy to use application that does something very useful: it helps you create a bootable USB installer for your Windows operating system. It basically takes your Windows installation disk and ports it to an USB stick.

Additional information on WinToFlash is available here.
The problem with having a Windows installation disk on a CD or DVD is that the aforementioned CD or DVD could get damaged. You could crack the disk or you could scratch it badly, thus making it unusable. Another problem is that it can be a bother to walk around with a CD or DVD in your pocket – especially when you take into consideration the fact that instead of a cumbersome CD or DVD, you could walk around with a tiny USB drive (or USB stick or Flash drive or whatever else you want to call it).


It is a lot more convenient to walk around with an USB installer for Windows instead of a CD or DVD. USB sticks are easier to carry around and they don’t get scratches on them which make them unusable. Those two facts alone are reason enough for me to want to ditch a Windows CD or DVD and move to an USB stick instead.

There is a very simple way to do so: get the right piece of software and you can easily turn a Windows CD or DVD to an USB installer. That “right piece of software” is the Novicorp-developed and appropriately named WinToFlash. What this application does is it takes the contents of a Windows installation CD or DVD and moves them to an USB stick, turning that stick into a bootable USB installer for Windows. So instead of using a CD or DVD to install the Microsoft-developed Windows operating system, you can use the USB stick instead.

The functionality the WinToFlash has to offer is an exceptional fact on its own. What I also found to be exceptional is the fact that accessing the functionality WinToFlash has to offer is a very straightforward matter. You would think that creating an USB installer to replace your Windows installation disk would be a big pain in the unmentionables and for that reason you would be tempted to avoid performing such a task. You don’t have to stay with your classic Windows installation disk because you think it’s hard to set up an USB installer. The simple truth of the matter is that it is a piece of cake with WinToFlash. The application is user friendly and thanks to its wizard you will be done in no time.

It must be mentioned here that the application is free only for personal use. If you like WinToFlash and want to support its development, consider getting a Personal License for a mere $5. Get a license and you will no longer see the ads.

IT professionals who need extra features can purchase a Professional License. Businesses who want to use WinToFlash must purchase a Business License.

How To Boot From a USB Device?

You might want to boot from a USB device, like an external hard drive or a flash drive, for many different reasons.
When you boot from a USB device, what you’re actually doing is running your computer with the operating system that’s installed on the USB device. When you start your computer normally, you’re running with the operating system installed on your hard drive – Windows, Linux, etc.
Follow these easy steps to boot from a flash drive, an external hard drive, or some other bootable USB device.
Difficulty: Easy
Time Required: Booting from a USB device usually takes less than 10 to 20 minutes.

Here’s How:

1. Change the BIOS boot order so the USB device option is listed first. The BIOS is rarely setup this way by default.
If the USB boot option is not first in the boot order, your PC will start “normally” (i.e. boot from your hard drive) without even looking at any boot information that might be on your USB device.
Note: After setting your USB device as the first boot device, your computer will check it for boot information each time your PC starts. Leaving your computer configured this way shouldn’t cause problems unless you plan on leaving the bootable USB device attached all the time.
2. Attach the USB device to your computer via any available USB port.
Note: Creating a bootable flash drive or configuring an external hard drive as bootable is a task in itself. Chances are you made it to my instructions here because you know whatever USB device you have should be bootable after properly configuring BIOS..
3. Restart your computer.
4. Watch for a Press any key to boot from external device… message.
On some bootable devices, you may be prompted with a message to press a key before the computer will boot to the flash drive or other USB device.
If you do nothing, your computer will check for boot information on the next boot device in the list in BIOS (see Step 1) which will probably be your hard drive.
Note: Most of the time when trying to boot to a USB device there is no key-press prompt. The USB boot process usually starts immediately.5.
5. Your computer should now boot from the flash drive or USB based external hard drive.
Note: What happens now depends on what the bootable USB device was intended for. If you’re booting to an old version of MS-DOS on a flash drive, MS-DOS will load. If you’re booting to the DSL version of Linux, it will start. You get the idea.
If you tried the above steps but your computer did not boot from the USB device, check out some of the tips mentioned in video

Printing problems are some of the most frustrating problems that we experience as computer users. It takes a long time, and sometimes it will not delete at all, blocking all subsequent print jobs. In some instances, even taking the printer offline, or rebooting the machine will not clear the printing queue. This article discusses what to try if you have a problem when you try to cancel a print job, or if you have a problem when you try to delete a print job from the print queue.

To clear the print job, simply follow these directions:

1. Navigate to “Services” under “Administrative Tools” (from either Control Panel, the Start>Programs menu, or right-click on My Computer and choose “Manage”)
2. Stop the Print Spooler services
3. Open Window Explorer (CTRL+E), and navigate to: C:\Windows\system32\spool\PRINTERS
4. Delete any offending print jobs (.spl file extensions).
5. Start the Print spooler service again.

Most of time Now a days when we buy high resoutaion digital camera and take picture from it then there is a big problem for it largage file size . suppose when u you have 10 Megapixel camera and you are taking snap with that resoultion then the file size increases. After long time time found a application wihich is pretty much simple and easy to use like other compresson software.

Advance JPEG Compressor is one of Shareware. It is not free but still you can use it up to trial period. The best feature that I like is you can compress your source multiple photo with single click that mean you need to compress individual photo one by one

Digital camera users benefit most from Advanced JPEG Compressor’s excellent abilities. It can be the perfect add-on to your other photo software.You can easily process multiple photos just in several clicks, as well as a single image.Advanced JPEG Compressor can reduce file size impressively – without any loss of quality. Smaller files take less space and can be uploaded and downloaded more quickly: effectively optimize photos for faster downloading from the Web, faster e-mail smaller image files – avoiding exceeding size limits – and compress scanned documents for storage or transferal.

Perform basic photo editing
Rotate and crop photos, fix red eyes, add text or graphic watermarks and modify color levels, saturation, contrast or sharpness. Use advanced noise removing filters, EXIF options and more.
With its ability to retain original picture quality, Advanced JPEG Compressor is a must for processing your digital photos.

 
USB  is most innovated ideas which causes revolution in field of computers,currently USB 2.0 is used in most of the computers which leads to a very high data transfer as compared to the older ones but now USB 3.0 is launched , next generation USB. USB 3.0 much faster and safe as compared to USB 2.0
New USB 3.0 products are 10 times  faster than USB 2.0 means data transfer speed upto 5 GB/ sec
Faster power transfer (900 mA) in USB 3.0 as compared to USB 2.0 (just 500 mA) means increase in speed of scanning by USB scanner and other equipments.
It also means that LAN connection will be replaced by USB 3.0 as it is much faster than LAN.
But if you want actual speed of USB 3.0 than you have to use both USB 3.0 equipment  and USB 3.0 ports, as in USB 2.0 ports, the speed of USB 3.0 equipments decreases and it will be same as USB 2.0 equipments or  you can use the USB card adaptors as shown above.

USB 3.0 is a great improvement to USB 2.0. The biggest difference is the speed at which it can communicate with computer’s . USB 2 had a maximum speed of 480 Mbps, which was very speedy at its time but now it might not be enough because we now have USB flashdisk drives which are 64 GB in size, cell phone and PDAs that have a lot of internal storage built in, and even at 480 Mbps a full transfer of data in between devices can take a long time. So now USB 3.0 has a speed of 4.8 Gbps, almost 10 times faster than USB 2.0. Now if we want to transfer files from a pc to a 64 Gigabyte flashdisk to full capacity, we can do it in under 20 minutes!!

To create a PDF Form you will need OpenOffice. As far as I know Microsoft Office doesn’t support PDF export. You can easily get the OpenOffice suite here: http://www.openoffice.org/

Open now OpenOffice Writer which is similar to MS Word of microsoft . You can now handle this page as you usually do as any other written document. But your question surely is: How do I insert form controls/fields?
To insert Form controls and fields go on View -> Toolbars -> Form Controls .This will show you a toolbar with plenty of useful form stuff such as Labels, Text Boxes, Check Boxes, etc…
In this toolbar you will also find another useful button, More Controls which allows you to insert even more controls.
Inserting form controls in your page should not be a problem. Just find a layout you like. You can treat this elements exactly as any other element like an image, a paragraph or whatever. With a right click on the object you can modify its properties. Really intresting are the “Control…” and “Data…” entries which allow you to set advanced properties of your newly creted object.
Once you have created your form it’s time to create the PDF file. You can click on the “Export directly as PDF” button directly from OpenOffice’s standard bar or either go on File->Export as PDF and select some more advanced options.
There you are! Now you have your PDF Form. You can fill it and print it obtaining a really standard piece of paper, useful if you have to collect lots of the same information from many people.This type of pdf form is usually used on internet by end user to fill it over computer and take print out and submit the form.
Important
Please note that you PDF module won’t be saveable. You can just have to fill it in and take a print in order not to loose their work!

>

Revo Uninstaller helps you to uninstall software and remove unwanted programs installed on your computer even if you have problems uninstalling and cannot uninstall them from “Windows Add or Remove Programs” control panel applet.

Revo Uninstaller is a much faster and more powerful alternative to “Windows Add or Remove Programs” applet! It has very powerful features to uninstall and remove programs:

Scanning for leftovers after uninstall – With its advanced and fast algorithm, Revo Uninstaller analyzes an application’s data before uninstall and scans after you uninstall a program. After the program’s regular uninstaller runs, you can remove additional unnecessary files, folders and registry keys that are usually left over on your computer.

Forced Uninstall – Uninstall even already uninstalled programs. This feature allows you to remove leftovers of programs that are already uninstalled, incomplete installations and uninstall remnants of programs!

Real-Time Installation Monitor – Revo Uninstaller Pro has real-time program installation monitoring. It detects system changes during installation, so you can undone them later.

Multi-Level Backup System – Revo Uninstaller Pro creates backups of removed registry keys, values, files and folders. It also creates full registry backup each time you uninstall a program.

With its unique “Hunter mode”, Revo Uninstaller offers you some simple, easy to use, but effective and powerful methods for uninstalling software. You can use it to manage your installed and/or running software programs.

>

With so many cracking tools coming up to break windows password, it’s very difficult to protect your personal computer from unauthorized access. Even BIOS password is easy to crack. Nothing is secure and safe these days.

Windows password can easily be hacked but you cannot get around this secret key which we will be going to store in a removable devices such as USB drive etc.
Here is steps given below
Before I am going to proceed first of all arrange a USB storage device and we will change the drive letter name for our windows

Photobucket

After you have inserted your USB device, right click My Computer -> Manage -> Storage -> Disk Management Now you will see all storage volumes there. Choose your USB volume, right click on it and select option Change Drive Letters and Paths…

1) Open run dialog box.
2.) Type SYSKEY and click OK.
3.) Check the Encryption Enabled radio button.
4.) Click on Update.
Photobucket
5.) Under System Generated Password choose Store Startup Key on Floppy Disk.
(Now many of you must be thinking that this tutorial is waste. Where in the hell should be get Floppy no? Don’t worry; you don’t require any Floppies for this. Just insert your USB device and change its Drive Letter to A:\. 


6.) Now return back to SYSKEY, choose Startup Key on Floppy Disk and click OK.
Photobucket
10.) No 10th Step. You are done.
The next time you start your computer, you’ll have to insert this USB device when asked and then only you can login to your account. You can also see a registry file named StartKey stored in your USB device.